How to Install Solar Panels in 2026

A solar panel installation begins long before panels reach the roof. It starts with a careful look at your electricity use, roof condition, shade, and future plans. A south-facing roof may seem ideal, yet a chimney’s afternoon shadow can change the design. Small details matter.

Energy economist Fatih Birol, Executive Director of the International Energy Agency, has said, “Solar power is now the cheapest electricity in history.” That broad observation does not guarantee the same result for every home. Equipment, labor, financing, and local utility requirements all affect cost and value. The numbers deserve a second look.

This guide explains how to plan a solar panel installation in 2026, compare system proposals, and prepare for installation day. You’ll learn what to ask about panel output, inverters, warranties, roof work, and monitoring. It also covers site assessment, system design, permits, inspections, and grid connection, which can vary by location. Get more than one detailed quote. Check the assumptions behind each estimate, especially shade, energy use, and projected savings. A neat proposal can still miss a real-world complication. That part is easy to overlook.

No two roofs are quite alike. The aim is not to buy the biggest system, but to choose one that fits your home and energy needs. Expect practical checks, clear questions, and a few points worth reconsidering before you sign.
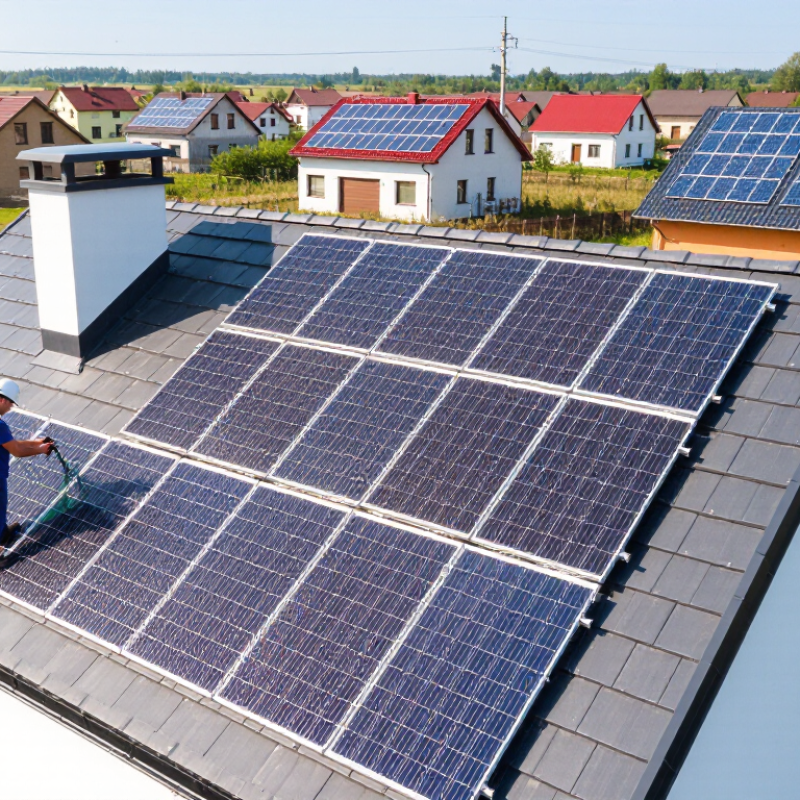
How to Install Solar Panels in 2026

Assess Your Energy Needs and Evaluate the Installation Site

How to Install Solar Panels in 2026

Before planning an installation, review twelve months of electricity bills and note your monthly use in kilowatt-hours. Compare summer and winter, not just the latest bill. Include changes you expect, such as an electric vehicle or a larger household. A system sized around today’s habits may not fit tomorrow’s. Seasonal use can surprise you.

Walk around the property at different times of day. Note shade from trees, chimneys, nearby buildings, and roof features. A clear roof at noon may be shaded in the morning. Check the roof’s age, surface condition, slope, and available space; a quick visual check cannot confirm structural strength. Ask a qualified solar professional to assess that. If the roof needs repairs soon, installing panels first may create extra work.

Tips:

Photograph the roof and shaded areas in the morning and afternoon. Keep a simple record of your bills. Ask how estimates account for shade, roof direction, and seasonal conditions. Treat any production figure as an estimate, not a promise.
Check 2026 Permits, Building Codes, and Incentive Eligibility

Before ordering panels in 2026, check permit requirements with your local building department. Rules can vary by city, county, utility, and property type. Ask which forms, drawings, and inspections apply to your address. A permit packet may require a roof plan, electrical diagram, and equipment specifications. Keep copies of approvals and inspection records. Small detail, big delay.

Confirm which building codes your jurisdiction has adopted; it may not use the newest edition. Ask how officials assess roof strength, wind or snow loads, fire-access pathways, and electrical work. A shaded roof or older framing can change the installation plan. Photos of the attic, roof, and electrical panel may help a qualified installer spot questions early. Still, photos are not a structural assessment.

Check incentive eligibility before signing a contract. Government programs and utility rebates may depend on location, ownership, installation date, system size, or energy-storage choices. Confirm current rules through official government or utility sources, and ask a tax professional about tax-related eligibility. A calculator estimate is not a promise. Also verify utility interconnection steps and required approval before the system is switched on. Save dated forms, receipts, and written confirmations; details can change, and even careful planning can miss one.

Choose a Solar System and Plan Its Design

Choose a solar system by matching it to your actual electricity use, not an idealized estimate. Review twelve months of utility bills and note seasonal peaks, such as summer cooling or winter heating. A typical daily total can guide system size, but future changes matter too. An electric vehicle or heat pump may increase demand. Start with the loads you expect to use.

Next, assess the roof and the space around it. Record usable area, roof angle, nearby trees, vents, and chimneys. Shade at one edge can reduce production more than expected. Small details matter. A site visit can confirm measurements and identify structural concerns that photos may miss. Ask a qualified solar professional to model expected output across seasons, using local sunlight data rather than a single sunny-day estimate.

Decide whether you need battery storage or mainly want daytime power. Batteries can provide backup, but they add cost and need a clear purpose, such as keeping essential lights and refrigeration running. Plan panel placement, wiring routes, inverter location, and access for maintenance before installation begins. It is tempting to fill every open roof section. That can be a poor trade if it complicates repairs or ignores changing household needs. Recheck the design against your bills, roof conditions, and budget.

How to Install Solar Panels in 2026 - Choose a Solar System and Plan Its Design

Annual Household Electricity Use Example Solar Array Size Approximate 400 W Panels Estimated Annual Solar Output Approximate Panel Area Key Design Checks
6,000 kWh 4.8 kW DC 12 About 6,240 kWh About 258 sq ft Check roof orientation, shading, and available uninterrupted roof space.
9,000 kWh 7.2 kW DC 18 About 9,360 kWh About 387 sq ft Group panels by similar sunlight exposure and account for roof obstructions.
12,000 kWh 9.6 kW DC 24 About 12,480 kWh About 516 sq ft Confirm roof condition and structure; compare inverter capacity with array output.
15,000 kWh 11.6 kW DC 29 About 15,080 kWh About 624 sq ft Review utility interconnection limits and whether multiple roof faces are needed.

Planning estimates assume 400 W modules, approximately 21.5 sq ft of panel surface per module, and an illustrative production rate of 1,300 kWh per kW of installed DC capacity per year. Actual output varies with location, roof direction and pitch, shading, weather, equipment, and system losses. Panel area excludes required roof access pathways, setbacks, and spacing. Before installation, arrange a roof and electrical assessment, confirm local permitting and utility requirements, and have the system design reviewed by a qualified professional.

Install the Mounting System, Panels, and Electrical Equipment

Begin with a roof check, not a drill. Confirm the rafters can support the system and mark the layout around vents, edges, and shaded areas. Install flashing and mounting feet exactly as specified; poor sealing can turn a small mistake into a ceiling stain. Tighten each fastener to the stated torque, since “as tight as possible” is not a reliable measurement. Leave room for drainage and future roof repairs.

Lift panels with a helper and secure them to the rails using the approved clamps. Keep cables off sharp edges and away from standing water. Connect the inverter, disconnects, and other electrical equipment according to their instructions. Solar wiring can remain hazardous in daylight, so do not handle exposed conductors or energized connectors. Have a qualified professional complete or inspect electrical connections and verify grounding, polarity, and system operation. Roof layouts can look tidy on paper and still feel awkward during installation; pause and reassess rather than forcing a fit.

Tips: Photograph hidden wiring and mounting points before covering anything. Check fasteners and cable clearance once more. A small detail is easy to miss. Keep the work area dry, and stop if wind or roof conditions become unsafe.

Complete Inspections, Grid Connection, and System Commissioning

How to Install Solar Panels in 2026
Complete Inspections, Grid Connection, and System Commissioning

Before energizing the system, check the permit drawings against the finished roof array, wiring, labels, and disconnects. An inspector may verify grounding, conductor protection, equipment access, and rapid-shutdown functions. Keep clear photos of the inverter display and electrical panel. Small details matter. Correcting a mislabeled circuit later can mean another visit. Confirm local inspection steps and utility interconnection requirements before scheduling, since approval processes vary.

After inspection, the utility may require an approved interconnection agreement, meter work, or permission to operate. Do not assume a spinning meter means the system is fully commissioned. A qualified installer should verify inverter settings, protective functions, monitoring, and production under safe operating conditions. NREL’s Best Practices for Operation and Maintenance of Photovoltaic and Energy Storage Systems recommends documented testing and clear system records. Those records help distinguish a setup issue from normal variation. A review by Jordan and Kurtz in Progress in Photovoltaics reported a median photovoltaic degradation rate of about 0.5% per year, making a reliable commissioning baseline useful for later performance checks.

Tips: Save inspection sign-offs, utility approval, equipment settings, and the first production readings together. Compare sunny-day output with the expected range, not a single perfect number; shade, temperature, and clouds all matter. If readings seem inconsistent, ask the installer to investigate before changing settings yourself.

How to Install Solar Panels in 2026: Inspections, Grid Connection & Commissioning

Illustrative residential rooftop solar timeline by project phase (calendar days)

Planning allowances: permitting and design, 30 days; equipment installation, 2 days; inspection, 7 days; utility interconnection, 21 days; commissioning, 1 day. Actual timelines vary by location, permitting requirements, inspection availability, weather, and utility processes.